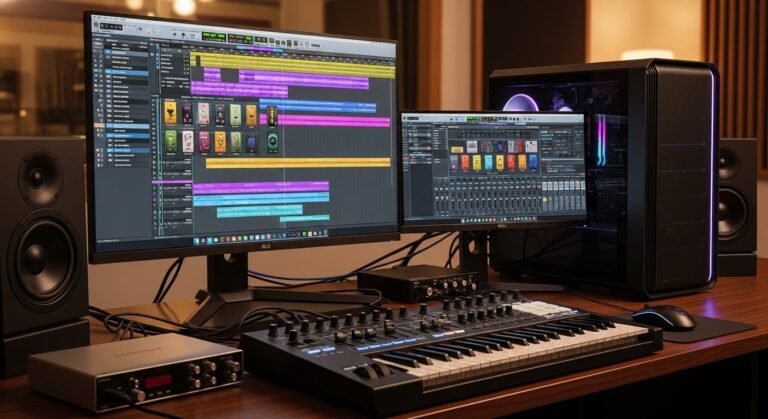

I’ve seen talented streamers invest in a powerful PC, a crisp microphone, and a sharp webcam, yet their video still looks dull or unprofessional. In my experience, lighting is usually the missing piece. If you want viewers to take your stream seriously, proper lighting is not optional, it’s foundational.
Overview
A professional Lighting for Streaming setup typically follows a three-point lighting method: a key light, fill light, and backlight placed around 45 degrees from your camera to minimize shadows and create separation from the background. Soft, diffused LED lights work best. Good lighting dramatically improves video clarity, enhances professionalism, and increases viewer retention by making your face more engaging and expressive on camera.
Why Is Lighting Important for Streaming?
Lighting directly affects how viewers perceive you. Even the best gameplay or content can feel amateurish if your face is underlit, shadowed, or washed out.
Professionalism & Credibility
Bright, even lighting makes your stream look polished. When I improve my lighting, my video instantly looks more intentional and trustworthy. Viewers subconsciously associate good lighting with quality production.
Depth & Dimension
Without proper lighting, your face blends into the background, creating a flat, two-dimensional look. Strategic lighting adds depth, making you stand out naturally from your environment.
Visual Clarity & Engagement
Facial expressions matter. Whether you’re reacting to gameplay or speaking directly to your audience, clear visibility helps build connection and trust.
Mood & Atmosphere
Lighting also shapes the tone of your stream:
- Warm tones (3000K–4000K): Cozy, relaxed vibe
- Neutral white (4000K–5000K): Clean and professional
- Cool tones (5000K+): Energetic, modern feel
If I want a balanced and natural look, I stick between 4000K and 5000K.
What Kind of Lights Are Best for Streaming?
For most setups, LED lights are the best option.
Here’s why I recommend them:
- Energy efficient and long-lasting
- Adjustable brightness
- Adjustable color temperature
- Produce less heat
- Compatible with cameras
Avoid relying on overhead ceiling lights or fluorescent bulbs. These often create harsh shadows, uneven exposure, and unwanted color casts.
If possible, choose lights that allow brightness and temperature control. That flexibility makes a huge difference when adjusting for different rooms or times of day.
How to Set Up Lights for Streaming
The ideal lighting arrangement depends on your space and budget. You can build a strong setup using one, two, or three lights.
Streaming With One Light
If I’m working with minimal space or budget, I start with a single LED light.
Best placement:
- Slightly above eye level
- Around 45 degrees to one side of the camera
Even one properly placed light is far better than overhead lighting. It improves clarity and reduces shadows, though it won’t fully eliminate them.
This setup works well for small bedrooms or compact desks.
Streaming With Two Lights
Two lights significantly upgrade your stream quality.
Setup:
- Key Light: Brightest light, 45 degrees from camera, slightly above eye level
- Fill Light: Opposite side, softer and dimmer
The key light creates shape and definition. The fill light softens harsh shadows. I usually keep my fill light at about 50–70% brightness of the key light for balance.
This setup gives you depth without requiring too much space.
Streaming With Three Lights (Best Option)
The three-point lighting setup delivers the most professional look.
1. Key Light (Main Source)
Position it 45 degrees from your camera and slightly elevated.
2. Fill Light (Shadow Control)
Place on the opposite side to reduce contrast.
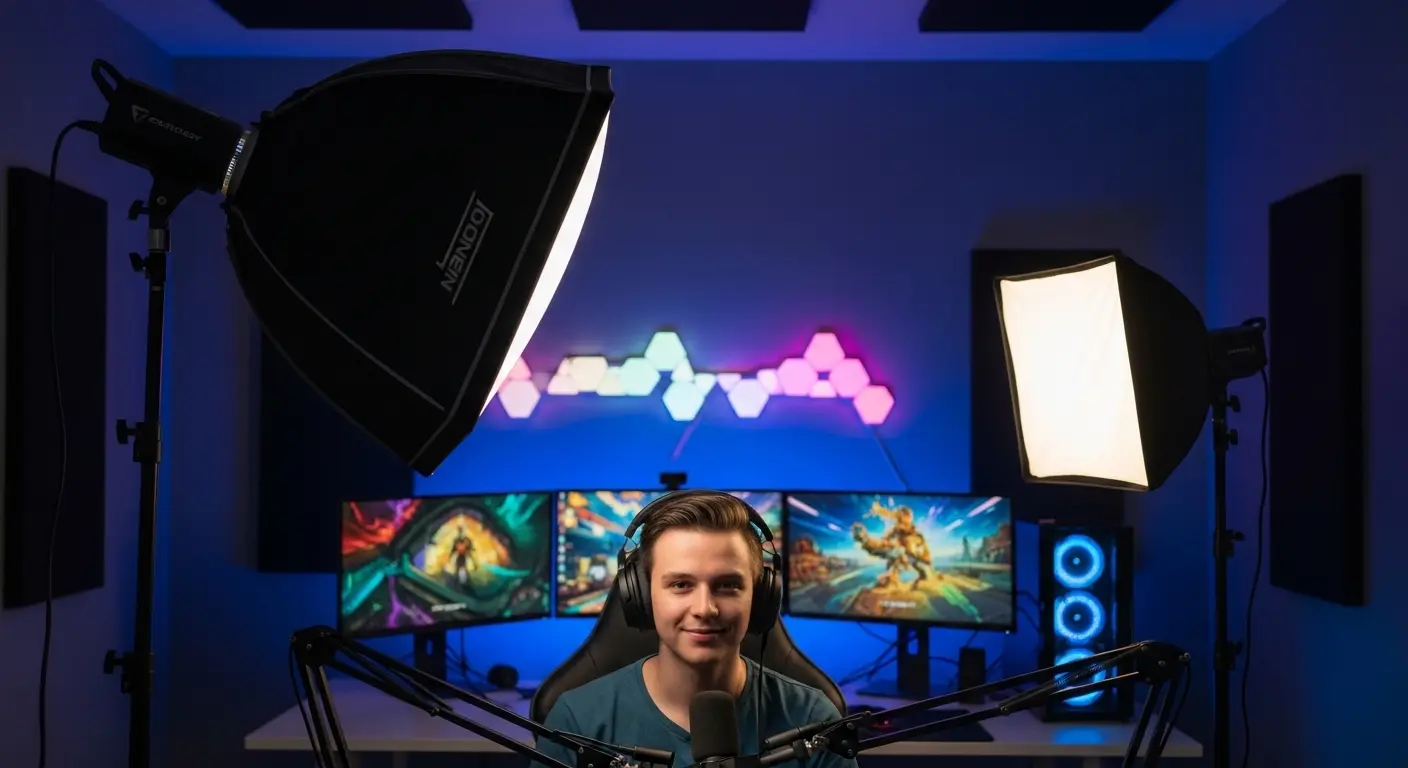
3. Backlight / Rim Light (Separation)
Place behind you, aimed at your shoulders or hair. This creates a subtle glow that separates you from the background.
When I add a backlight, my stream instantly looks more dynamic and studio-like.
Additional Lighting Options to Consider
Use Diffused Light
Harsh lighting can create shiny skin and sharp shadows. I prefer soft lighting using:
- Softboxes
- Built-in diffusers
- White cloth diffusion
Soft light is more flattering and easier on viewers’ eyes.
Add Background Lighting
RGB or flood lights can enhance your background without overpowering your face. They’re not replacements for key lighting but can elevate your stream’s visual appeal.
Natural Light (With Caution)
If you stream during the day, window light can work well—but it’s inconsistent. I avoid mixing strong natural light with artificial light unless I can control it with curtains.
Key Tips for Success
- Avoid placing lights directly overhead. Top-down lighting creates unflattering shadows.
- Don’t overexpose your face. If your skin looks washed out, lower brightness.
- Keep lights at eye level or slightly above for the most natural look.
- Maintain consistent color temperature across all lights.
- Use LEDs for adjustability and efficiency.
How Much Do Streaming Lights Cost?
Lighting setups vary widely in price.
- Budget setup: Under $100 (basic LED panels or desk lights)
- Mid-range setup: $100–$300 (adjustable LED panels with stands)
- Advanced setup: $300+ (professional-grade panels with full control)
You don’t need to spend thousands to look professional. In my experience, a well-placed mid-range LED kit delivers excellent results.
Recommended Streaming Lights
If you’re looking for reliable options, here are popular choices streamers often consider:
- Elgato Key Light – Compact, powerful, app-controlled brightness and temperature.
- Neewer 480 LED Video Light – Affordable two-light kit with adjustable stands.
- VILROX VL-200T – Flexible three-light setup for a full studio look.
- GLW RGB LED Flood Lights – Great for adding color and depth to your background.
Each of these works well depending on your space and budget.
Conclusion
You can have the best camera and microphone, but without proper lighting, your stream won’t reach its full potential.
A simple three-point setup using adjustable LED lights can:
- Improve clarity
- Increase professionalism
- Boost viewer retention
- Enhance your overall presence
I always treat my stream like a live production. When I dial in my lighting, everything else feels elevated.
Don’t underestimate it—lighting is one of the easiest and most impactful upgrades you can make.
FAQs
How to set up good lighting for streaming?
To set up good lighting for streaming, I focus on three things: placement, softness, and balance.
First, place your main light (key light) about 45 degrees to one side of your camera and slightly above eye level. This gives your face shape instead of making it look flat. Then, add a softer light on the opposite side to reduce harsh shadows. If possible, add a small light behind you to separate yourself from the background.
I also make sure my lights are diffused (not harsh and direct) and set to a neutral white color temperature around 4000K–5000K. That keeps my skin tones looking natural.
What is the 3 lighting rule?
The “3 lighting rule” refers to three-point lighting:
Key Light – Your main and brightest light.
Fill Light – A softer light that reduces shadows.
Backlight (Rim Light) – A light placed behind you to create separation from the background.
This setup prevents harsh shadows, adds depth, and makes your stream look more professional. I personally find this method makes the biggest difference in overall quality.
What lighting is good for streaming?
LED lights are usually the best choice for streaming. They’re bright, adjustable, energy-efficient, and don’t overheat your room.
Look for:
Adjustable brightness
Adjustable color temperature
Soft or diffused panels
Avoid relying only on ceiling lights — they create unflattering shadows. A simple LED panel or ring light placed at eye level works much better.
What are the 4 C’s of lighting?
The 4 C’s of lighting commonly refer to:
Color – The temperature of the light (warm vs cool).
Contrast – The balance between light and shadow.
Clarity – How clearly your face and features are visible.
Control – Your ability to adjust brightness and direction.
For streaming, control is especially important. If I can dim or adjust my lights easily, I can fine-tune my setup quickly before going live.
What is the 5’7″ lighting rule?
The 5’7″ lighting rule is often mentioned in photography and video, suggesting that your key light should be placed roughly 5–7 feet away from the subject and slightly above eye level.
For streaming, the exact distance depends on your room size, but the idea is the same:
Don’t place the light too close (causes harsh glare) and don’t place it too far (causes weak lighting). I usually adjust distance until my face looks evenly lit without shiny hotspots.
What is the ideal streaming setup?
The ideal streaming setup includes:
A good webcam or camera
Clear microphone audio
Three-point lighting
Clean, distraction-free background
Stable internet connection
Lighting and audio matter more than having the most expensive PC. I always prioritize clear sound and good lighting before upgrading anything else.
What are common streaming mistakes to avoid?
Some of the most common streaming mistakes I see are:
Using only overhead ceiling lights
Sitting in front of a bright window (causes silhouette effect)
Overexposing the face with lights that are too bright
Mixing different color temperatures
Ignoring background clutter
Another big mistake is not testing your lighting before going live. I always do a quick camera check to adjust brightness and angles before starting my stream.
Do I need three lights to stream professionally?
No. A single well-placed key light can work. However, adding a fill light and backlight creates better depth and a more polished look.
Is a ring light good for streaming?
Yes, especially for beginners. Ring lights provide even facial lighting but may lack depth compared to a three-point setup.
What color temperature is best for streaming?
Neutral white between 4000K and 5000K usually looks the most natural on camera.
Can I use natural light for streaming?
Yes, but it’s inconsistent. Changes in sunlight can affect exposure during your stream.